

The BBC micro:bit is an award-winning programmable device that allows students to get hands-on with coding and digital making. It can sense Light, Temperature, Sound, Movement, and Magnetism.
It can be used to make smart home devices and even basic robots.
Features on the front
Your BBC micro:bit has a wide range of features for you to explore. Find out more about each of the numbered features below.
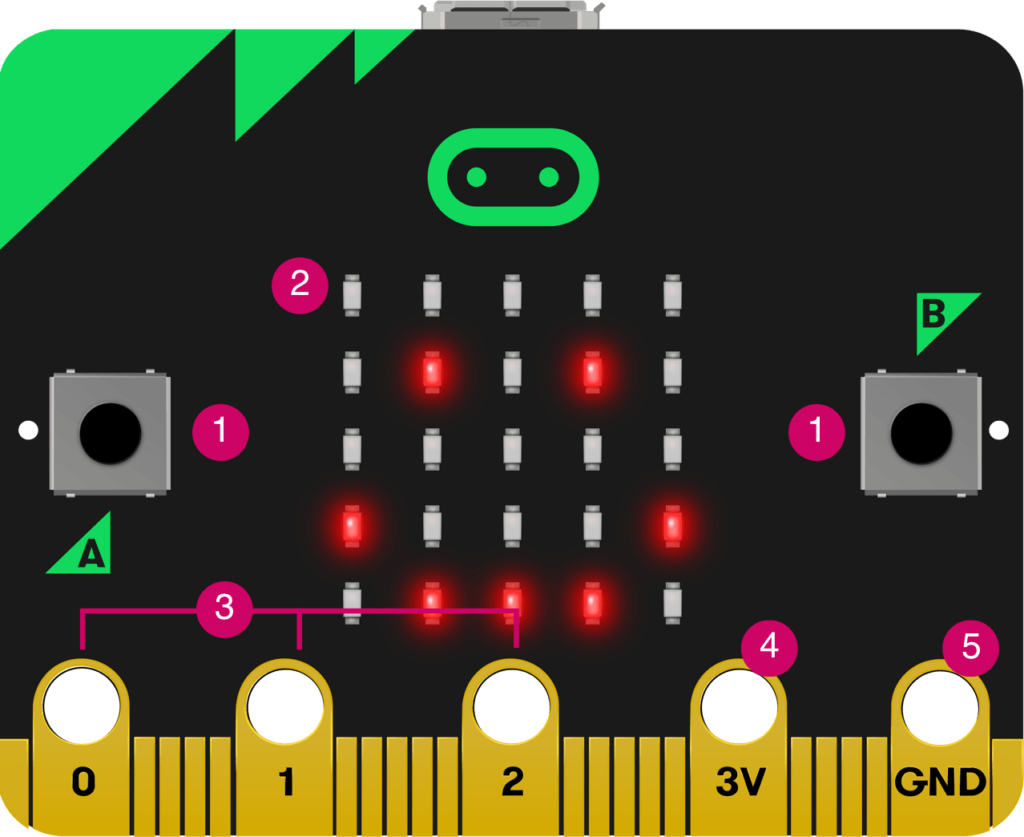
1. Buttons
The micro:bit has two buttons on the front that can be used separately or together to make things happen.
2. LED Display and Light Sensor
25 LEDs arranged in a 5×5 grid make up the display for showing pictures, words and numbers. They can also act as sensors, measuring how much light is falling on your micro:bit.
3. Pins- GPIO
The GPIO pins allow you to connect headphones, sense touch and add other electronics to expand the possibilities of your micro:bit. The new micro:bit has indentations to grip crocodile clips more securely.
4. Pin 4 – 3 Volt Power
The GPIO pins allow you to connect headphones, sense touch and add other electronics to expand the possibilities of your micro:bit. The new micro:bit has indentations to grip crocodile clips more securely.
5. Pin – Ground
The GND pin is the ground or Earth pin – it’s used to complete electrical circuits when you connect headphones, LEDs or external switches to your micro:bit.
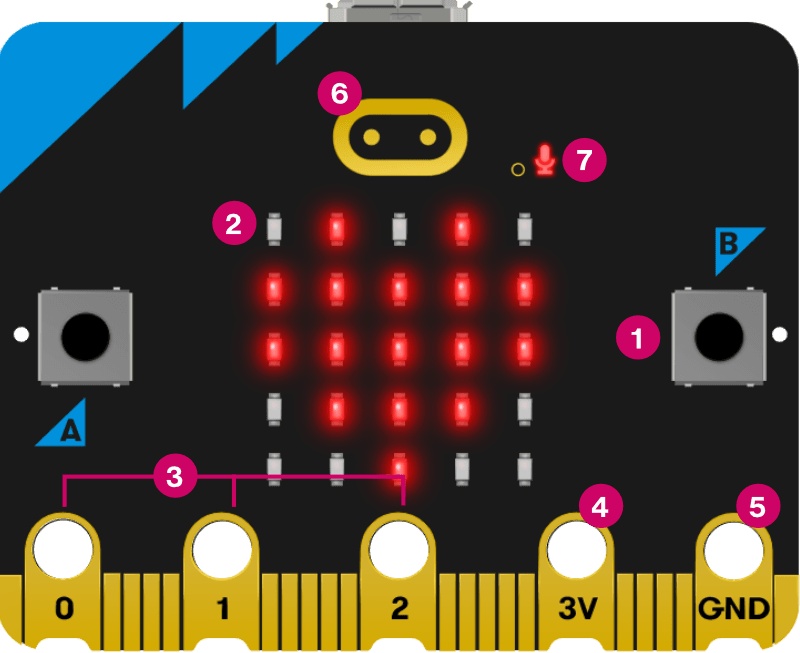
6. Touch Logo
The micro:bit has an extra input. The gold logo also works as a touch sensor. You can use it as an extra button in your programs, in addition to the A and B buttons.
7. Microphone LED
You can create programs that react to loud and quiet sounds and measure noise levels with the new micro:bit’s built-in microphone. The microphone LED shows you when the microphone is actively measuring sound levels. Just to the left of the LED, you’ll see a small hole where the sound goes in.
Features on the back
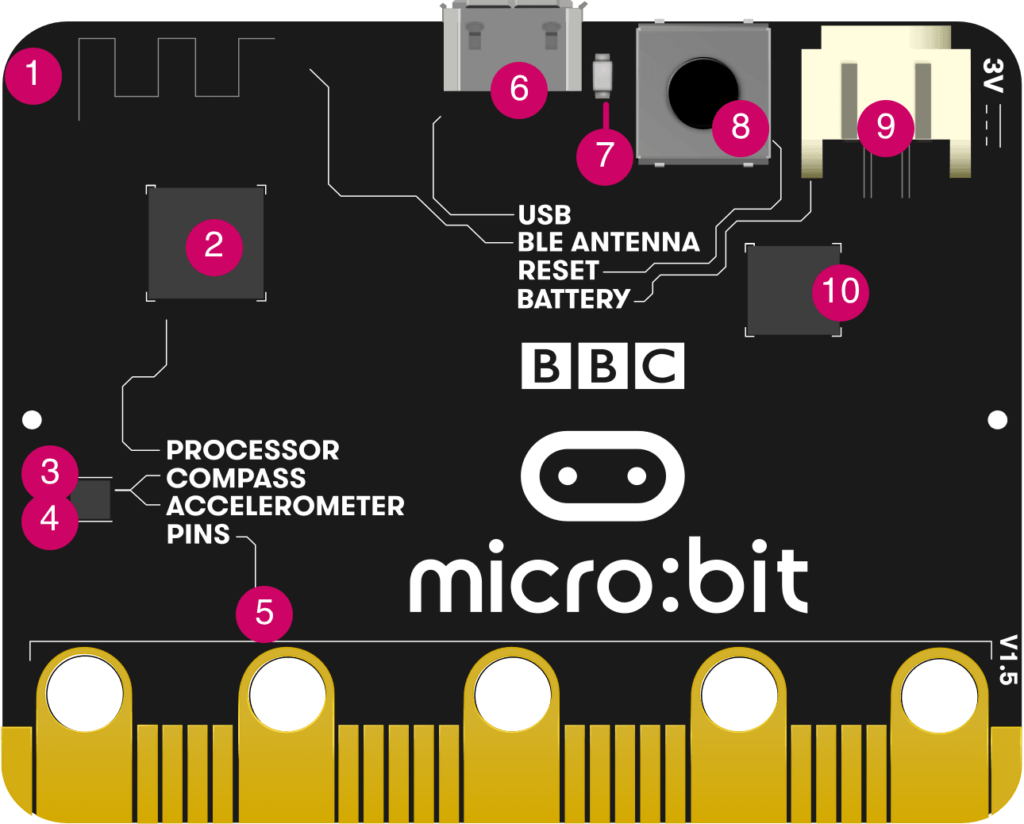
1. Radio & Bluetooth
Your micro:bit can communicate with other micro:bits by radio, and with other devices using Bluetooth.
2. Processor and Temperature Sensor
The micro:bit’s processor is its brain, fetching, decoding and carrying out your instructions. It also contains a temperature sensor so you can measure how warm or cold your environment is.
3. Compass
Find magnetic North or measure the strength of magnetic fields using the micro:bit’s compass. It can measure magnetic fields in three dimensions, so you can use this for science experiments or for making simple door or window alarms.
4. Accelerometer
The micro:bit’s accelerometer measures forces in 3 dimensions, including gravity, so your projects can tell which way up your micro:bit is. You can use it for science experiments, add shake inputs to games or make simple alarms that alert you when someone moves your things.
5. Pins
Connect your micro:bit to make headphones, simple switches and electronics, sense touch and more. The pins can power simple accessories like colourful lights, motors and robots.
6. Micro USB Socket
Download programs to your micro:bit from a computer and power it using its USB interface.
7. Single Yellow LED
The single LED on the back of the original micro:bit flashes when you are downloading a program to it, and lights to show it’s being powered from the USB socket.
8. Reset Button
Restart your micro:bit programs with the reset button.
9. Battery Socket
Instead of powering your micro:bit from the USB socket, you can unplug it from your computer and use a battery pack instead. This is really useful if you want to take your micro:bit outside, wear it or play games with it. It can run for a long time using just two AAA batteries.
10. USB Interface Chip
The interface chip is used for flashing new code to the micro:bit, sending and receiving serial data to and from your computer by USB.
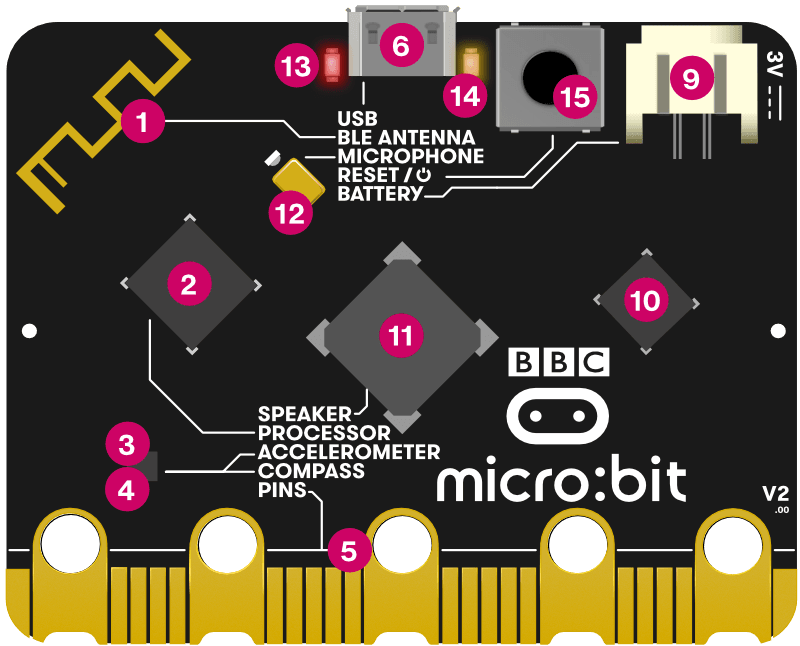
11. Speaker
The micro:bit with sound has a built-in speaker so you even more easily add music and new sounds to your projects.
12. Microphone
The micro:bit’s microphone and indicator LED are fixed to the back of the board. The LED lights up when it’s monitoring sound levels and is visible as a microphone icon on the front of the board. The front also has a small hole to allow sound to enter the microphone.
13. Red Power LED
The red LED on the back of the micro:bit shows when your micro:bit has power, either from batteries or a USB cable.
14. Yellow USB LED
On the micro:bit a yellow LED light flashes when your computer is communicating with the micro:bit over USB, for example when you flash a program file.
15. Reset & Power Button
Pressing this on the micro:bit will reset the micro:bit and run your program again from the start. If you hold it down, the red power LED will fade. When the power LED goes dark, release the button and your micro:bit is in power-saving sleep mode. Use this to make your batteries last longer. Press the button again to wake up your micro:bit.